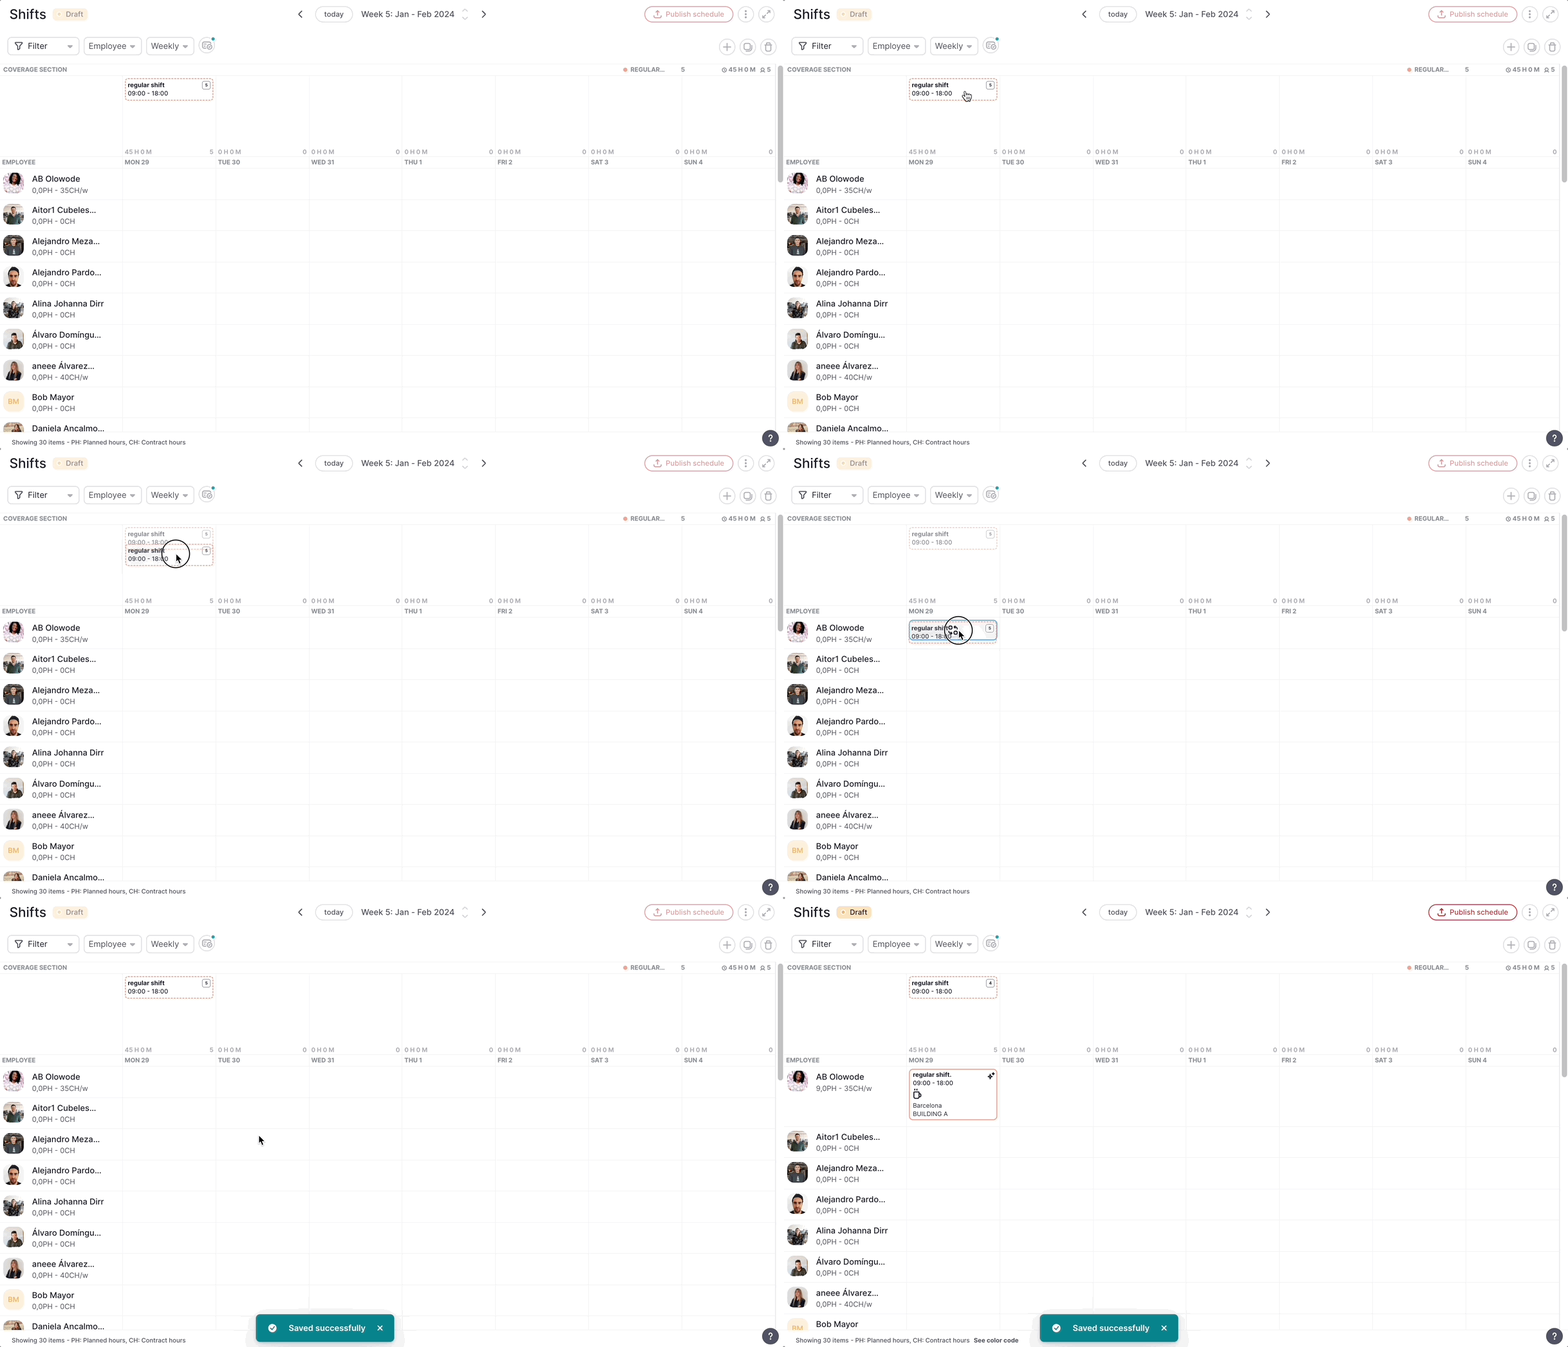
You will be able to create the distribution of shifts needed and then assign them to employees:
- Creating the concept of empty shift
- Creating all needed shifts for a week
- Being able to copy or store patterns of weeks (normal week, busy week, low week...) to apply them once and again
- Assigning those shifts to employees easily in bulk or individually with drag-and-drop
Where to find shifts in Coverage
- From your sidebar menu, go to Shifts
- On the header, click on the coverage icon
- A new section will appear named Coverage Section

How to create a shift
- Hover your mouse over the cell where you want to add the shift and click the button (+)
- A modal window will appear
- Put the number of employees
- You can choose between:
- Create a new shift
- Select a saved shift
- Fill in the information required
- Save

To learn more about how to create shifts, click here.
Assigning coverage shifts
There are two ways to assign shifts:
By dragging and dropping the shift into the employee’s shift cell

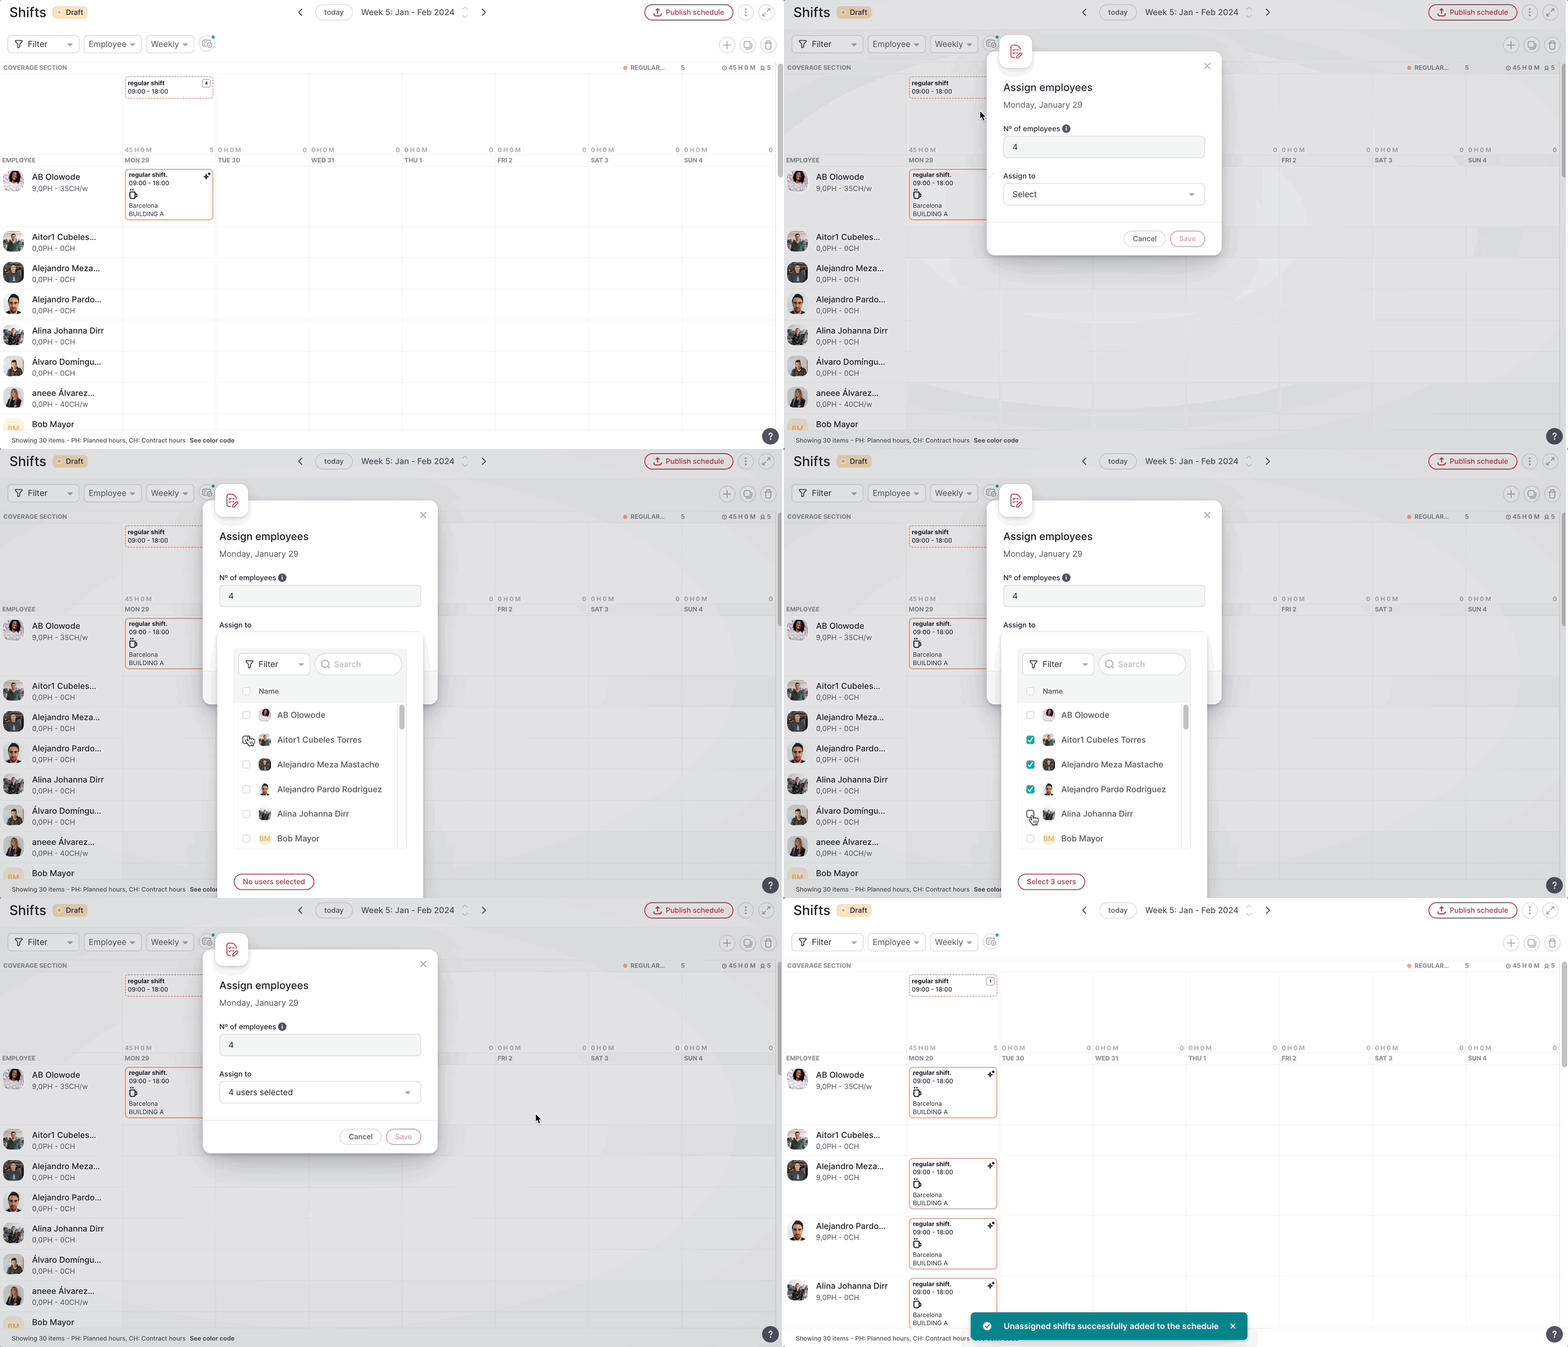
From the shift you created
- Hover your mouse over the (#) located on the right of the shift name
- Click on the three dots
- Select Assign employees
- Select the employees
- Click on Select (#) users
- and Save

Managing coverage shifts
- Hover your mouse over the (#) located on the right of the shift name
- Click on the three dots
- Choose between:
- Show details
- Edit
- Delete
- Choose between:

Remember to click on Publish schedule every time you are done editing or adding a shift.
Copying coverage periods
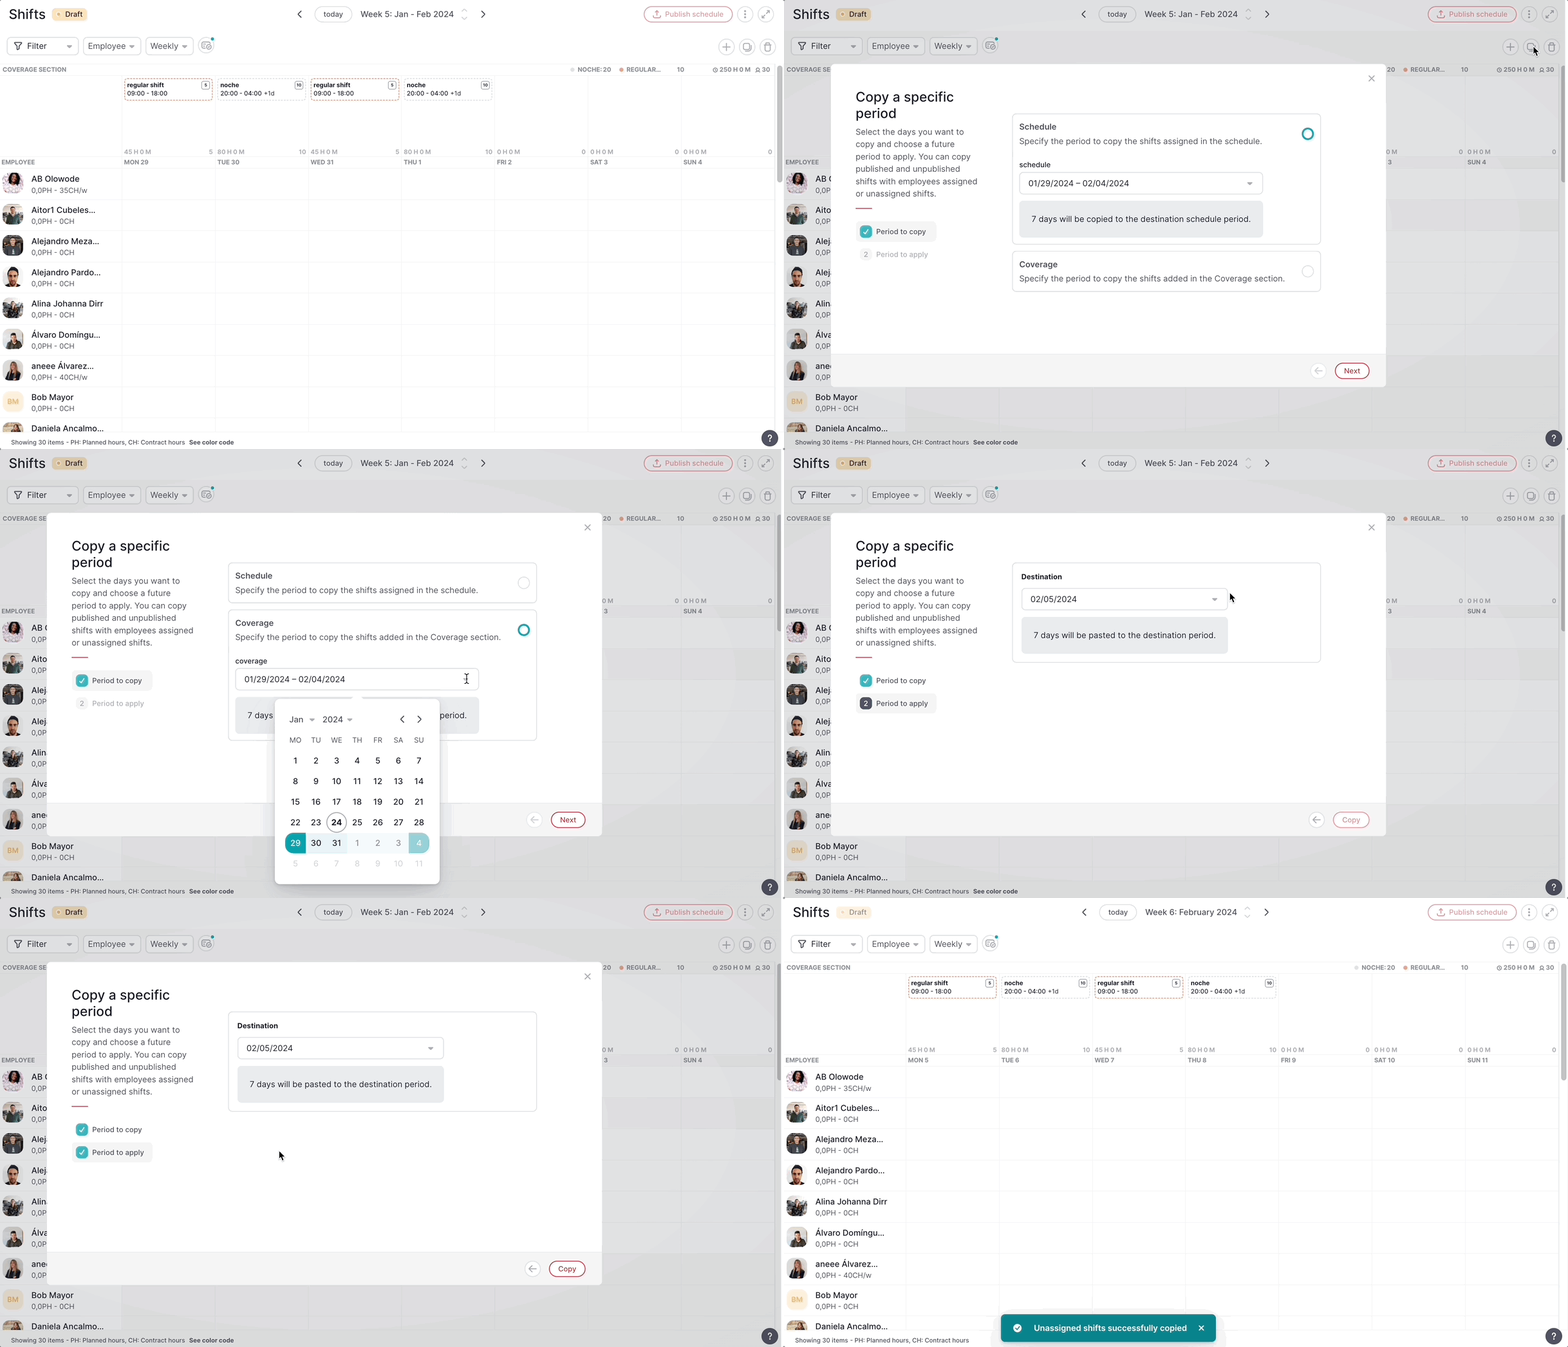
Copy any period of existing unassigned shifts and reapply them easily to another period.
- Click on the Copy schedule period icon
- Choose Coverage
- Specify the period to copy. The selected period cannot be greater than 3 months.
- Click on Next
- Indicate the date when the copy starts
- Click on Copy
