Where to find custom tables
- On your sidebar, go to Settings
- In General, click on Customization
- Scroll down to the Custom tables section

How to add custom tables
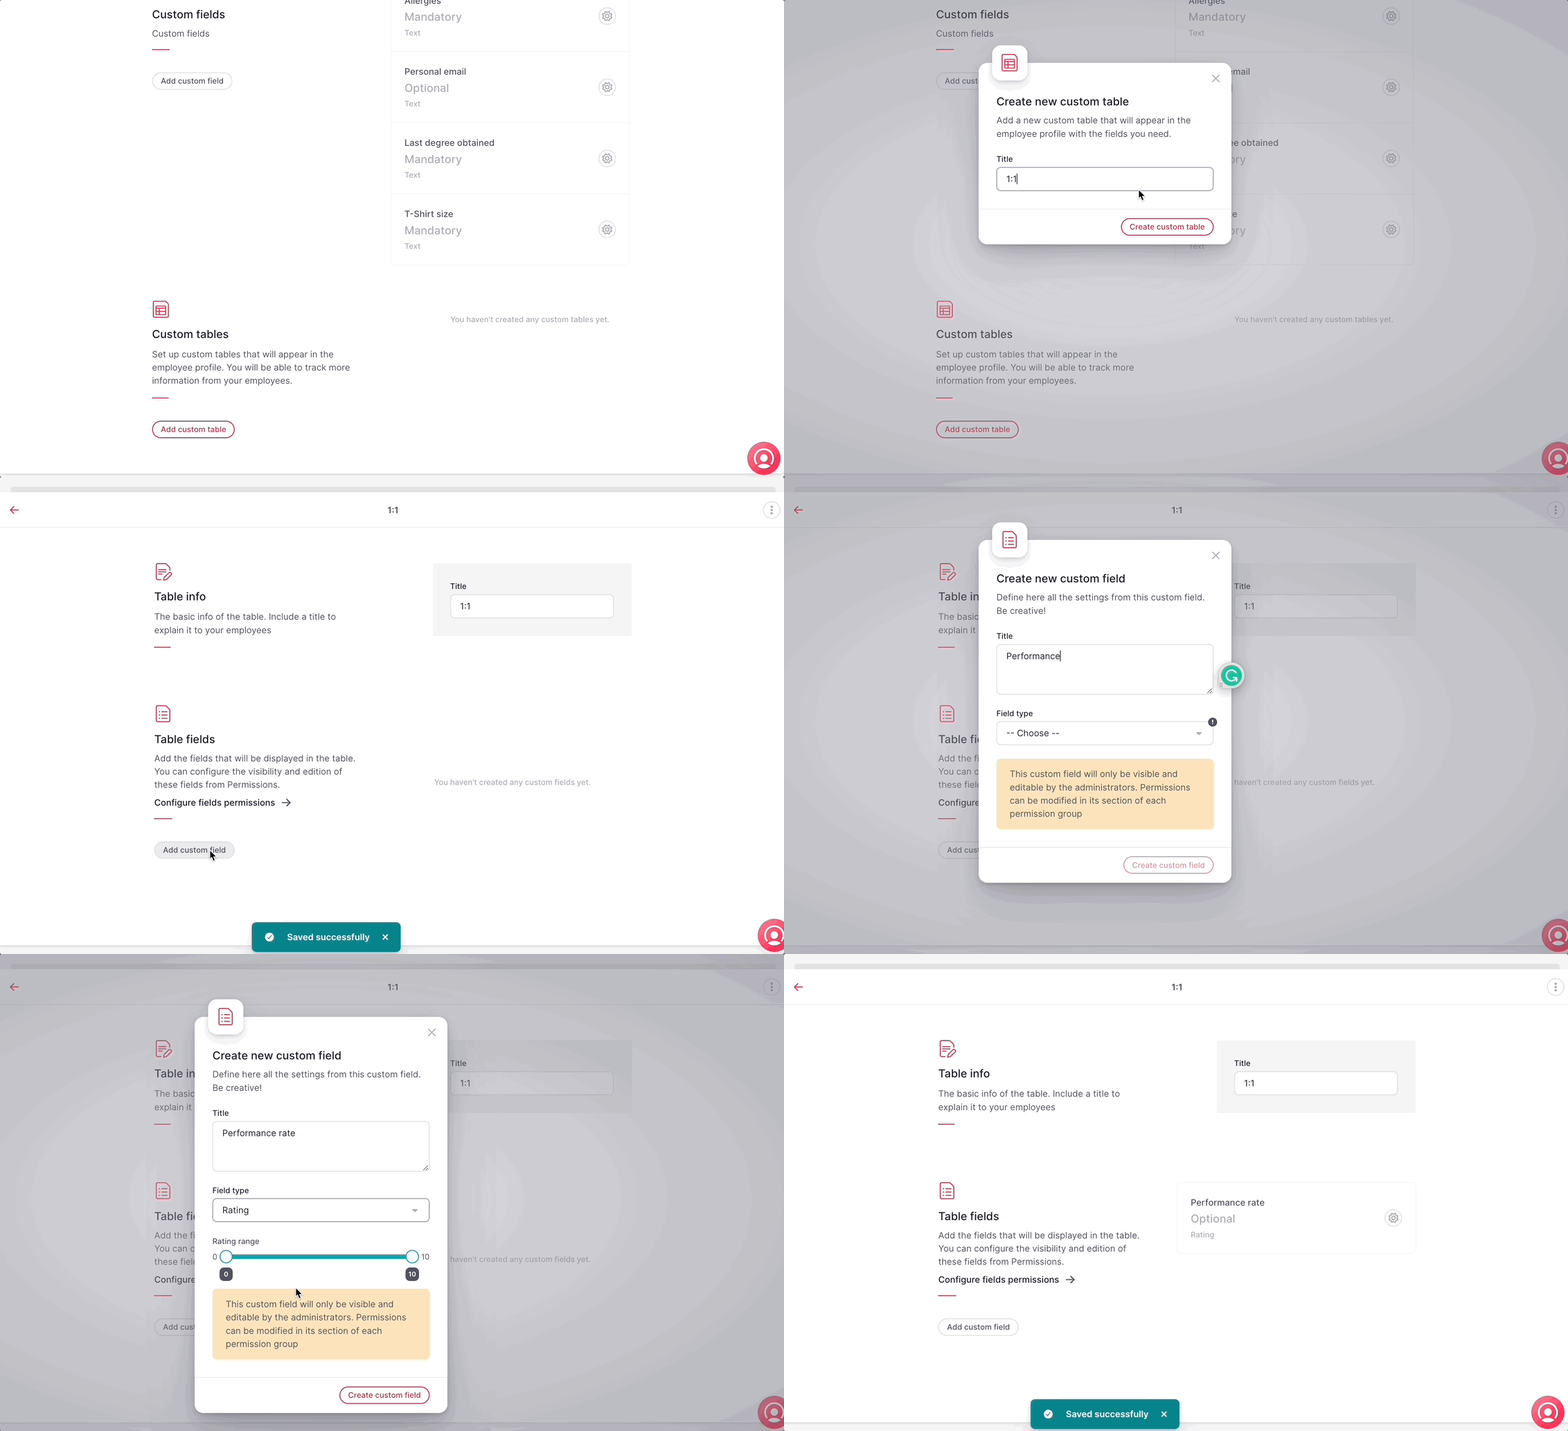
- Click on Add custom table
- Enter a Title
- Click on Create custom table
- To add table fields, click on Add custom field
- Enter a new Custom field title
- Choose the Field type:
- Text
- Long text
- Date
- Number
- Rating
- Single choice
- Click on Create custom field

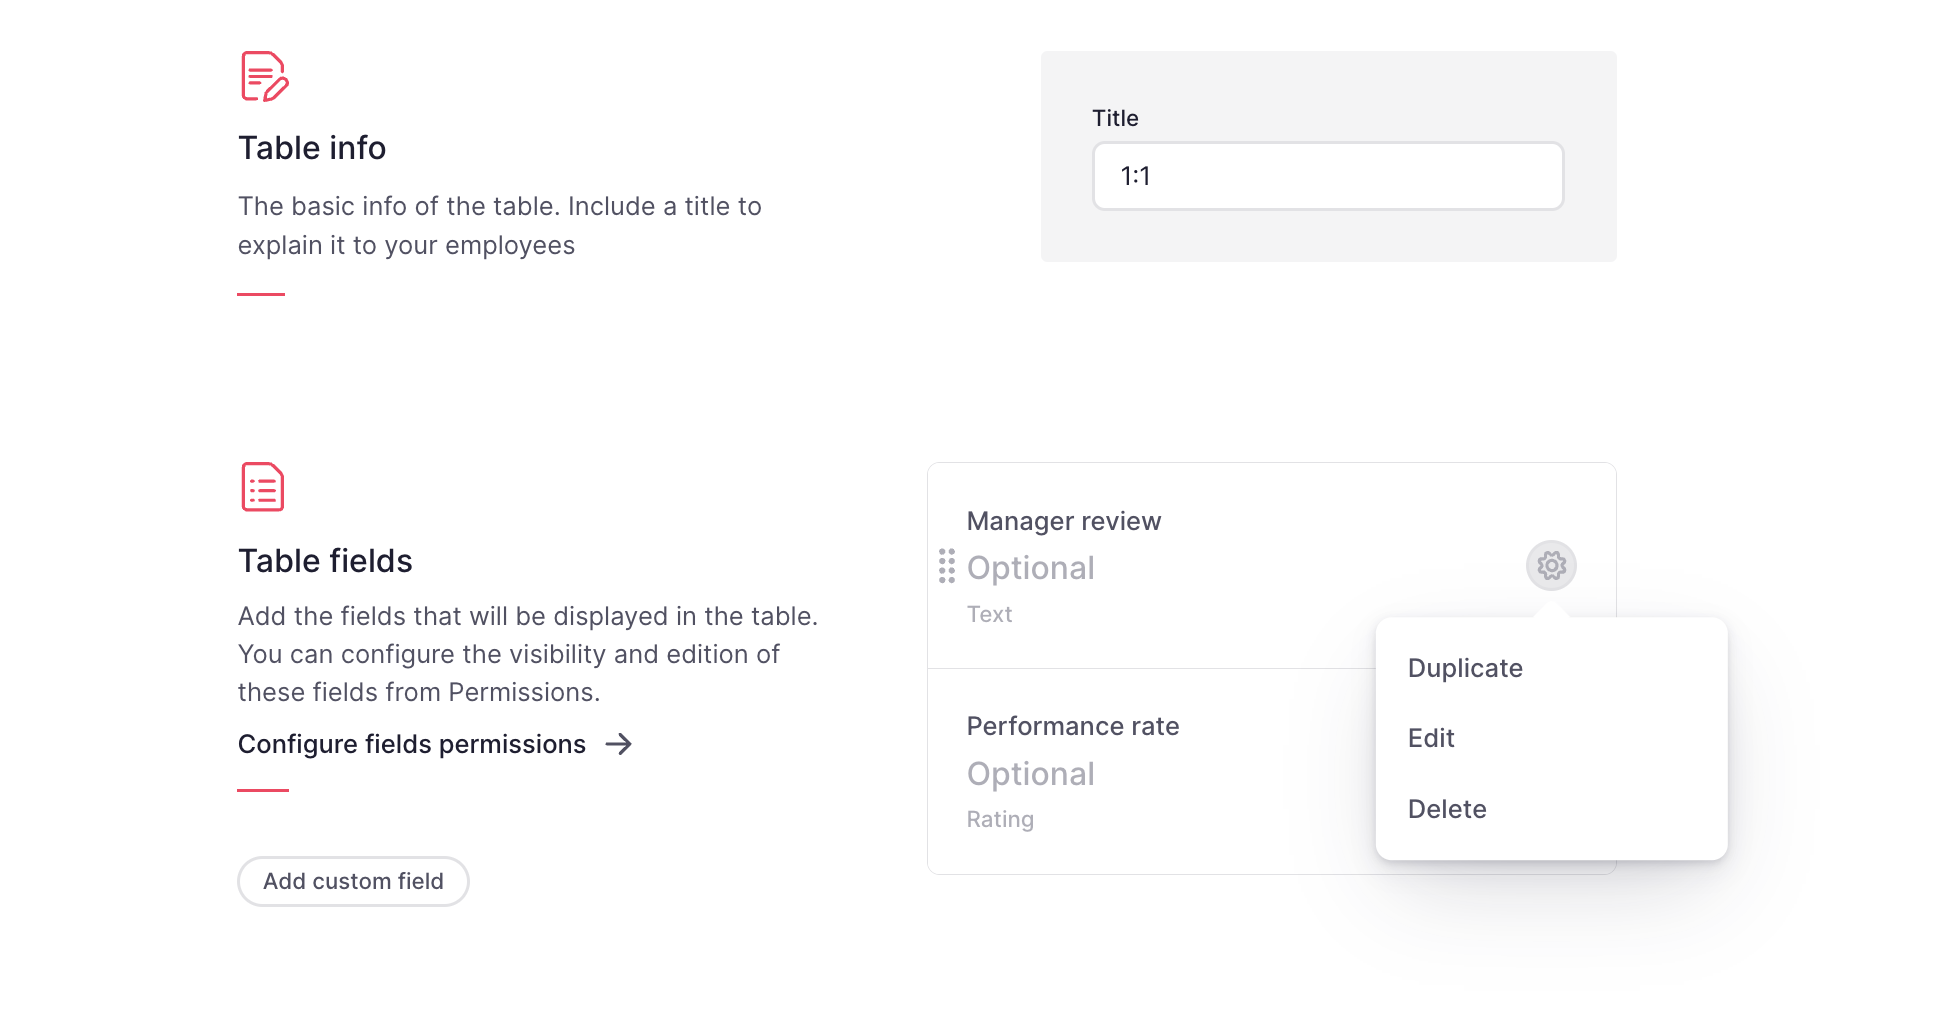
To duplicate, edit or delete a custom field, click on the gear icon and select the option.

How to reorder custom tables
You can easily change the order in which custom tables appear in the employee profile.
- On your sidebar, go to Settings
- In General, click on Customization
- Scroll down to the Custom tables section
- Drag and drop any table to rearrange it to the desired position

Where custom tables appear
Custom tables created will be visible in the employee's profile:
- On your sidebar, go to Organisation
- Select an employee
- Click on Others tab

How to import custom tables in bulk
Custom tables importer serves to add new records, not to modify the existing ones. Each row will be a new record and you can add multiple records to the same employee by adding a new row with the required columns (First name, Last name, and Email fields are required).
- On your sidebar, go to Organisation
- Click on the three dots icon, in the upper right corner
- Select Import data to tables
- Download the Custom tables template
- Open the template and add the information you need
- Upload the updated file
- Click on Import file

Custom tables permissions
Administrators have exclusive visibility and editing rights for each custom fields.
- To modify the permissions for each table field within each permission group
- On your sidebar, go to Settings
- In General, select Permissions
- Open the Permission group
- Select Custom fields
- Enable the permission
- Click on Save changes
- To enable employees to add or remove records:
- On your sidebar, go to Settings
- In General, select Permissions
- Open the Permission group
- Select Custom tables
- Enable the permission
- Click on Save changes
