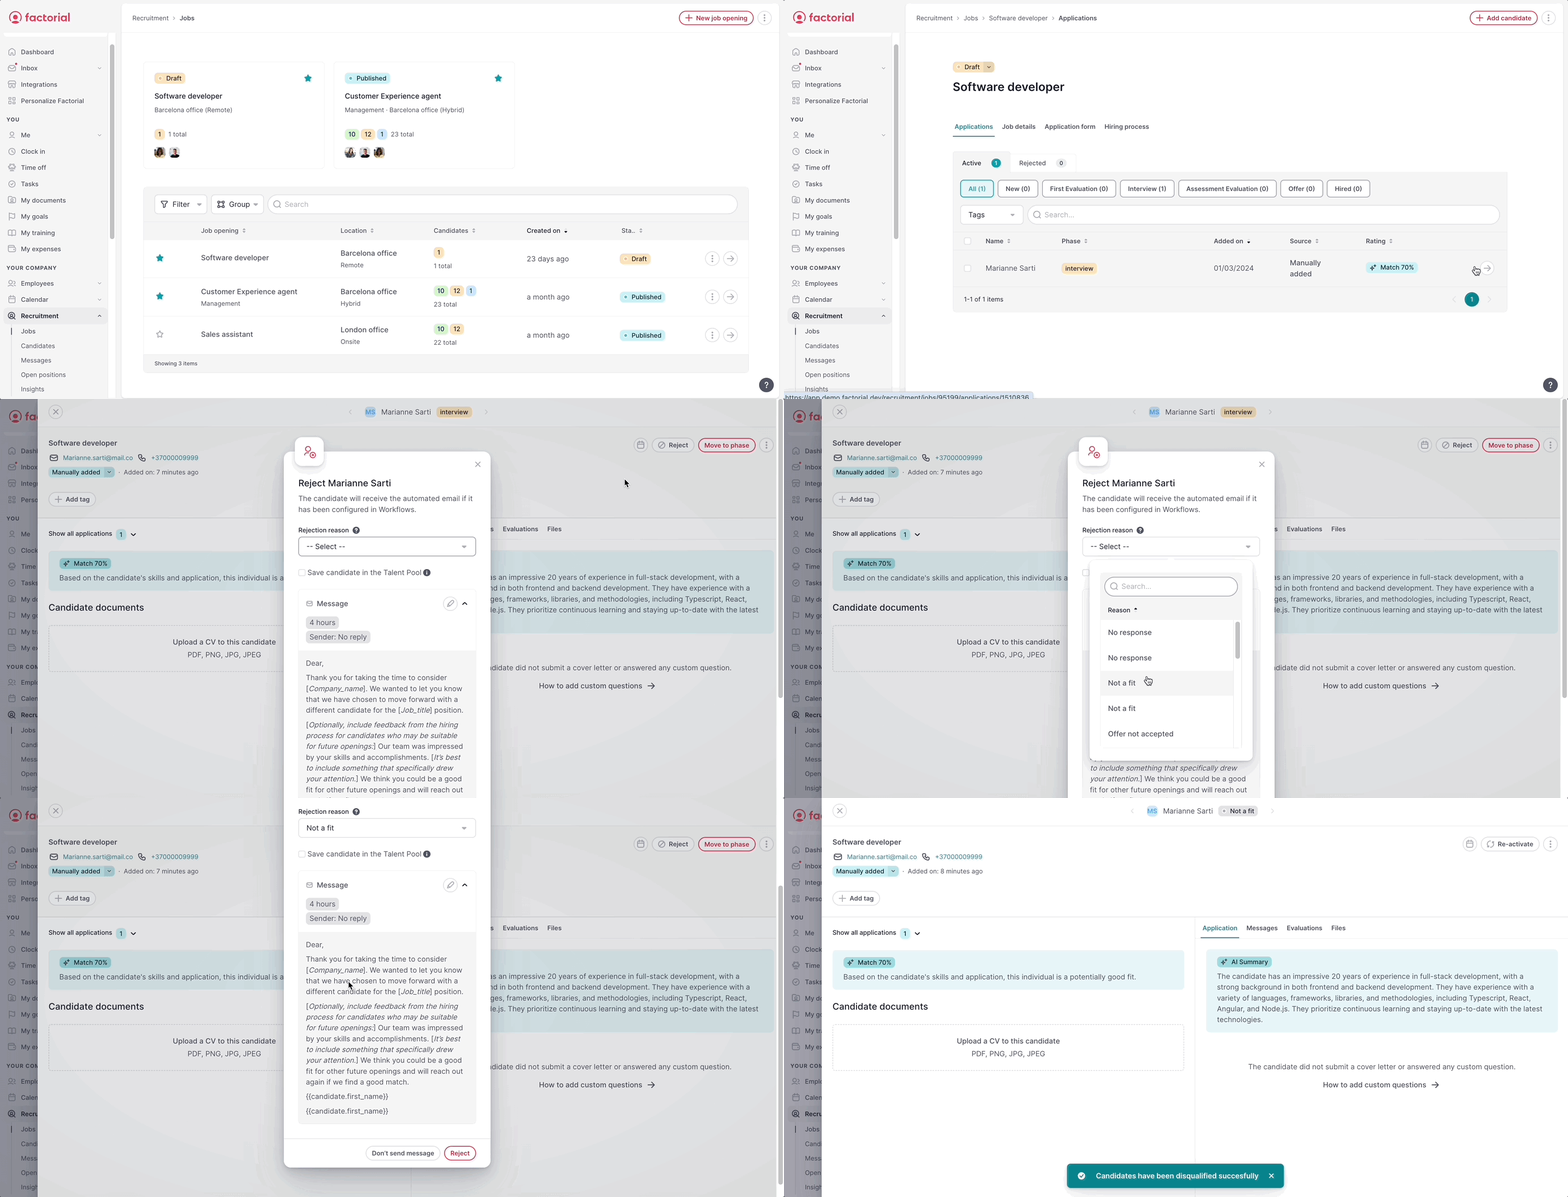
Jedes Mal, wenn eine Person oder eine Bewerbung abgelehnt wird, wirst du aufgefordert, die Ablehnungs-E-Mail zu konfigurieren und zu versenden. Du kannst eine individuelle Nachricht schreiben oder den Prozess vereinfachen, indem du eine E-Mail-Vorlage verwendest.
So verwendest du die Ablehnungs-E-Mail-Vorlage im Bewerbungsprozess
Stelle sicher, dass du eine Ablehnungs-E-Mail-Vorlage im Voraus erstellt hast. Hier erfährst du, wie du eine erstellst.
- Gehe zum entsprechenden Stellenangebot
- Wähle die Bewerber:innen aus, die du ablehnen möchtest, indem du das Kästchen neben ihrem Namen aktivierst (du kannst mehrere auswählen, um eine Massen-E-Mail zu versenden)
- Klicke auf Ablehnen rechts neben der Suchleiste
- Fülle die folgenden Informationen aus:
- Ablehnungsgrund: Wähle den passendsten Grund aus
- Nachrichtenvorlage: Wähle die E-Mail-Vorlage
- Nachricht: Bearbeite die Nachricht und Variablen bei Bedarf
- Entscheide, ob du die Nachricht von einer no-reply-Adresse senden möchtest
- Entscheide, ob du den Versand planen möchtest
- Klicke auf Ablehnen
Die Person wird in den Abschnitt Abgelehnt verschoben
.gif)
Konfiguriere Ablehnungs-E-Mails mit Smart Actions
Konfiguriere im Voraus verschiedene Ablehnungsnachrichten für jede Phase.
Du findest die Smart Actions in der Konfiguration des Stellenangebots:
- Wähle im Abschnitt Stellenangebote des Recruiting-Moduls das gewünschte Stellenangebot aus
- Klicke oben rechts auf den roten Button Bearbeiten
- Wähle Smart Actions
So konfigurierst du die Ablehnungs-E-Mail-Vorlage:
- Klicke auf +Erstellen unter „Ablehnungs-E-Mail senden“
- Wähle die Phasen aus, in denen die Nachricht gesendet werden soll
- Schreibe die Nachricht oder wähle eine bestehende Vorlage aus
- Aktiviere bei Bedarf die Option Von einer no-reply-Adresse senden (die E-Mail wird von einer no-reply-Adresse gesendet und mit Unternehmensfarben und Logo gebrandet)
- Du kannst den Versand der E-Mail planen
- Klicke auf Erstellen
.gif)
Vergiss nicht, die Aktion nach dem Erstellen zu aktivieren.
.gif)
Du kannst so viele Ablehnungs-E-Mail-Vorlagen erstellen, wie du möchtest. Zum Beispiel kann die Nachricht nach einem ersten Vorstellungsgespräch anders sein als nach der finalen Phase.
Wenn du eine:n Bewerber:in ablehnst, wird dir die vorkonfigurierte E-Mail angezeigt:
- Öffne das Profil der Bewerber:in
- Klicke auf Ablehnen
- Wähle den Ablehnungsgrund aus
- Du kannst die Person in der Talentdatenbank speichern
- Du siehst die konfigurierte Ablehnungs-E-Mail und kannst sie bei Bedarf bearbeiten
- Klicke auf Ablehnen
