To make the SSO configuration with Factorial the person responsible for the SSO connection within the client company has to provide Factorial with a metadata file.
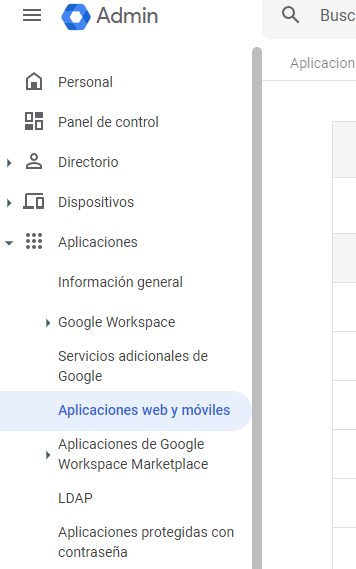
In Google Admin Console
- Go to the Google Admin Console
- Click on web and mobile applications
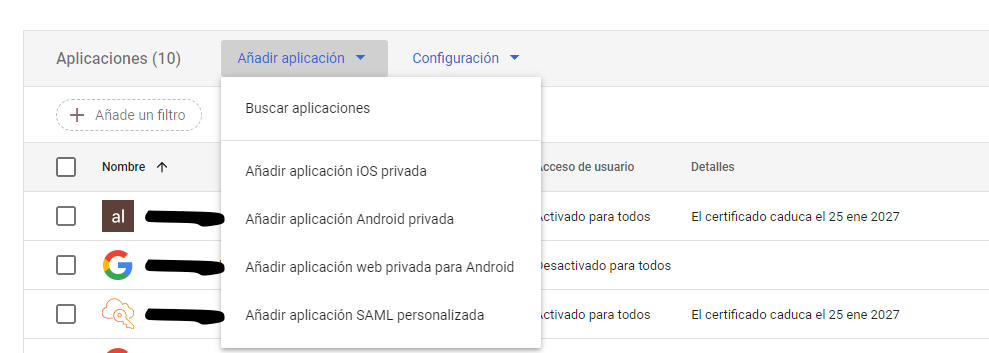
3. Click on Add Application and then Add custom SAML Application
4. Add the SAML application name
5. Click on Continue
-Sep-20-2022-02-06-11-90-PM.png)
6. Skip the step number two
7. On step number three fill in the required fields according to this configuration:
**ACS URL (Assertion Consumer Service URL):**
  https://factorial-production.auth.eu-central-1.amazoncognito.com/saml2/idpresponse

**Entity ID:**
  urn:amazon:cognito:sp:eu-central-1_Y8iEmyaEp

**Name ID configuration
  Name ID format:**
    UNSPECIFIED

**Name ID:**
  Basic Information > Primary email
8. Add the mapping attributes according to this table:
**Atribute mappings

  Google Directory attributes             |    App attributes**

	Basic Information > Primary email       |    email
	Basic Information > First name          |    given_name
	Basic Information > Last name.          |    family_name
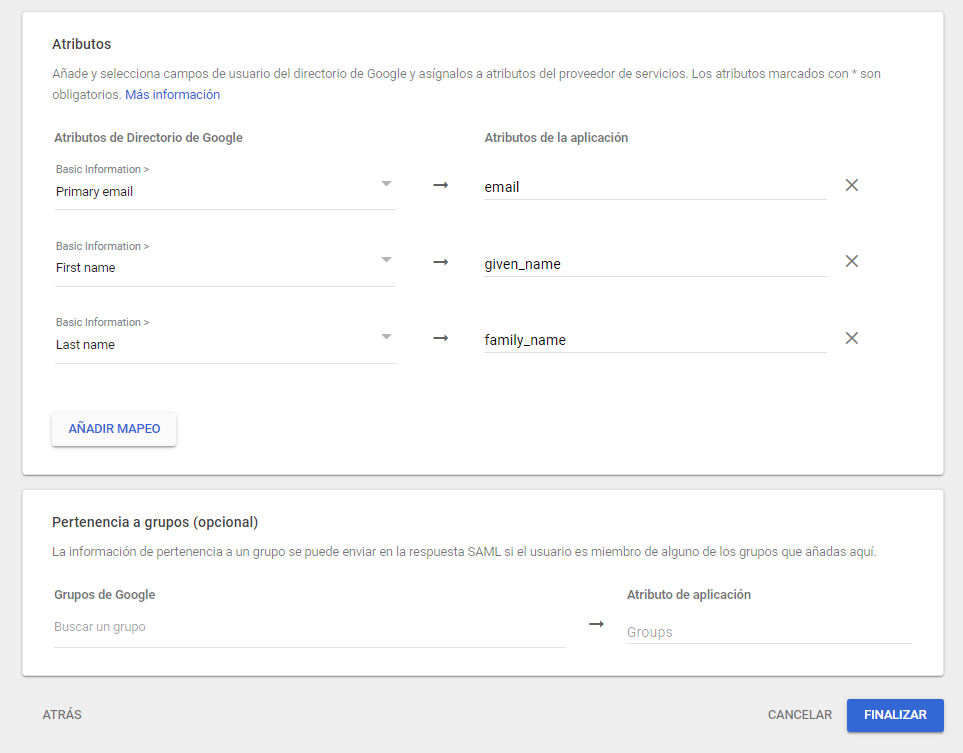
If you don’t want to change the App attributes, you should provide us with the primary email, first name, and last name identifiers.
9. Click on Finish and your new SAML application will be created.
To enable members of your organization to use this SAML application, there is a User Access block that is initially set to "Deactivated for everyone" by default. To activate the service for your organization, click on "More details" and then activate it.
.png)
.png)
10. Download the Metadata file

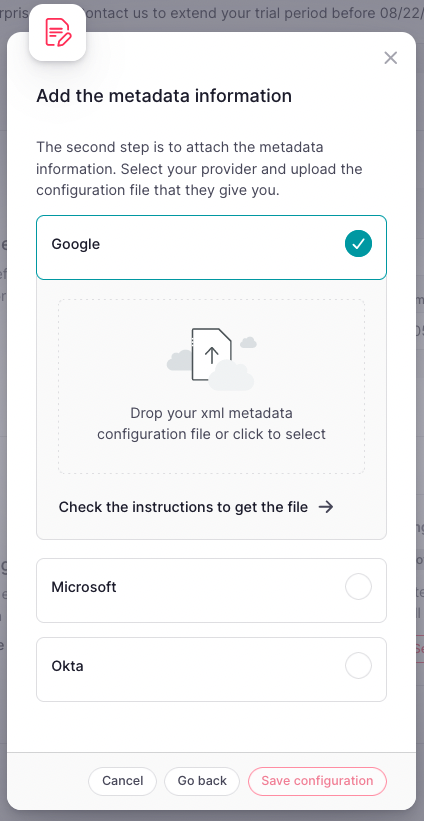
In Factorial
- On your sidebar, go to Settings
- In General, click on Company details
- Scroll down until you find Single Sign On (SSO)
- Click on Set-up SAML SSO
- Add your Company's domain: add only the domain, for example, with hello@factorialhr.com you would have to include only factorialhr.com. If your company has multiple domains, add them here as well.
- Click on Next step
- Enable Google
- Drag and drop (or select on your computer) the downloaded Metadata XML file
- Click on Save configuration