Centralize and automate your invoices by utilizing our OCR-powered mailbox. Allow our system to automatically update costs for your applications through our dedicated email address.
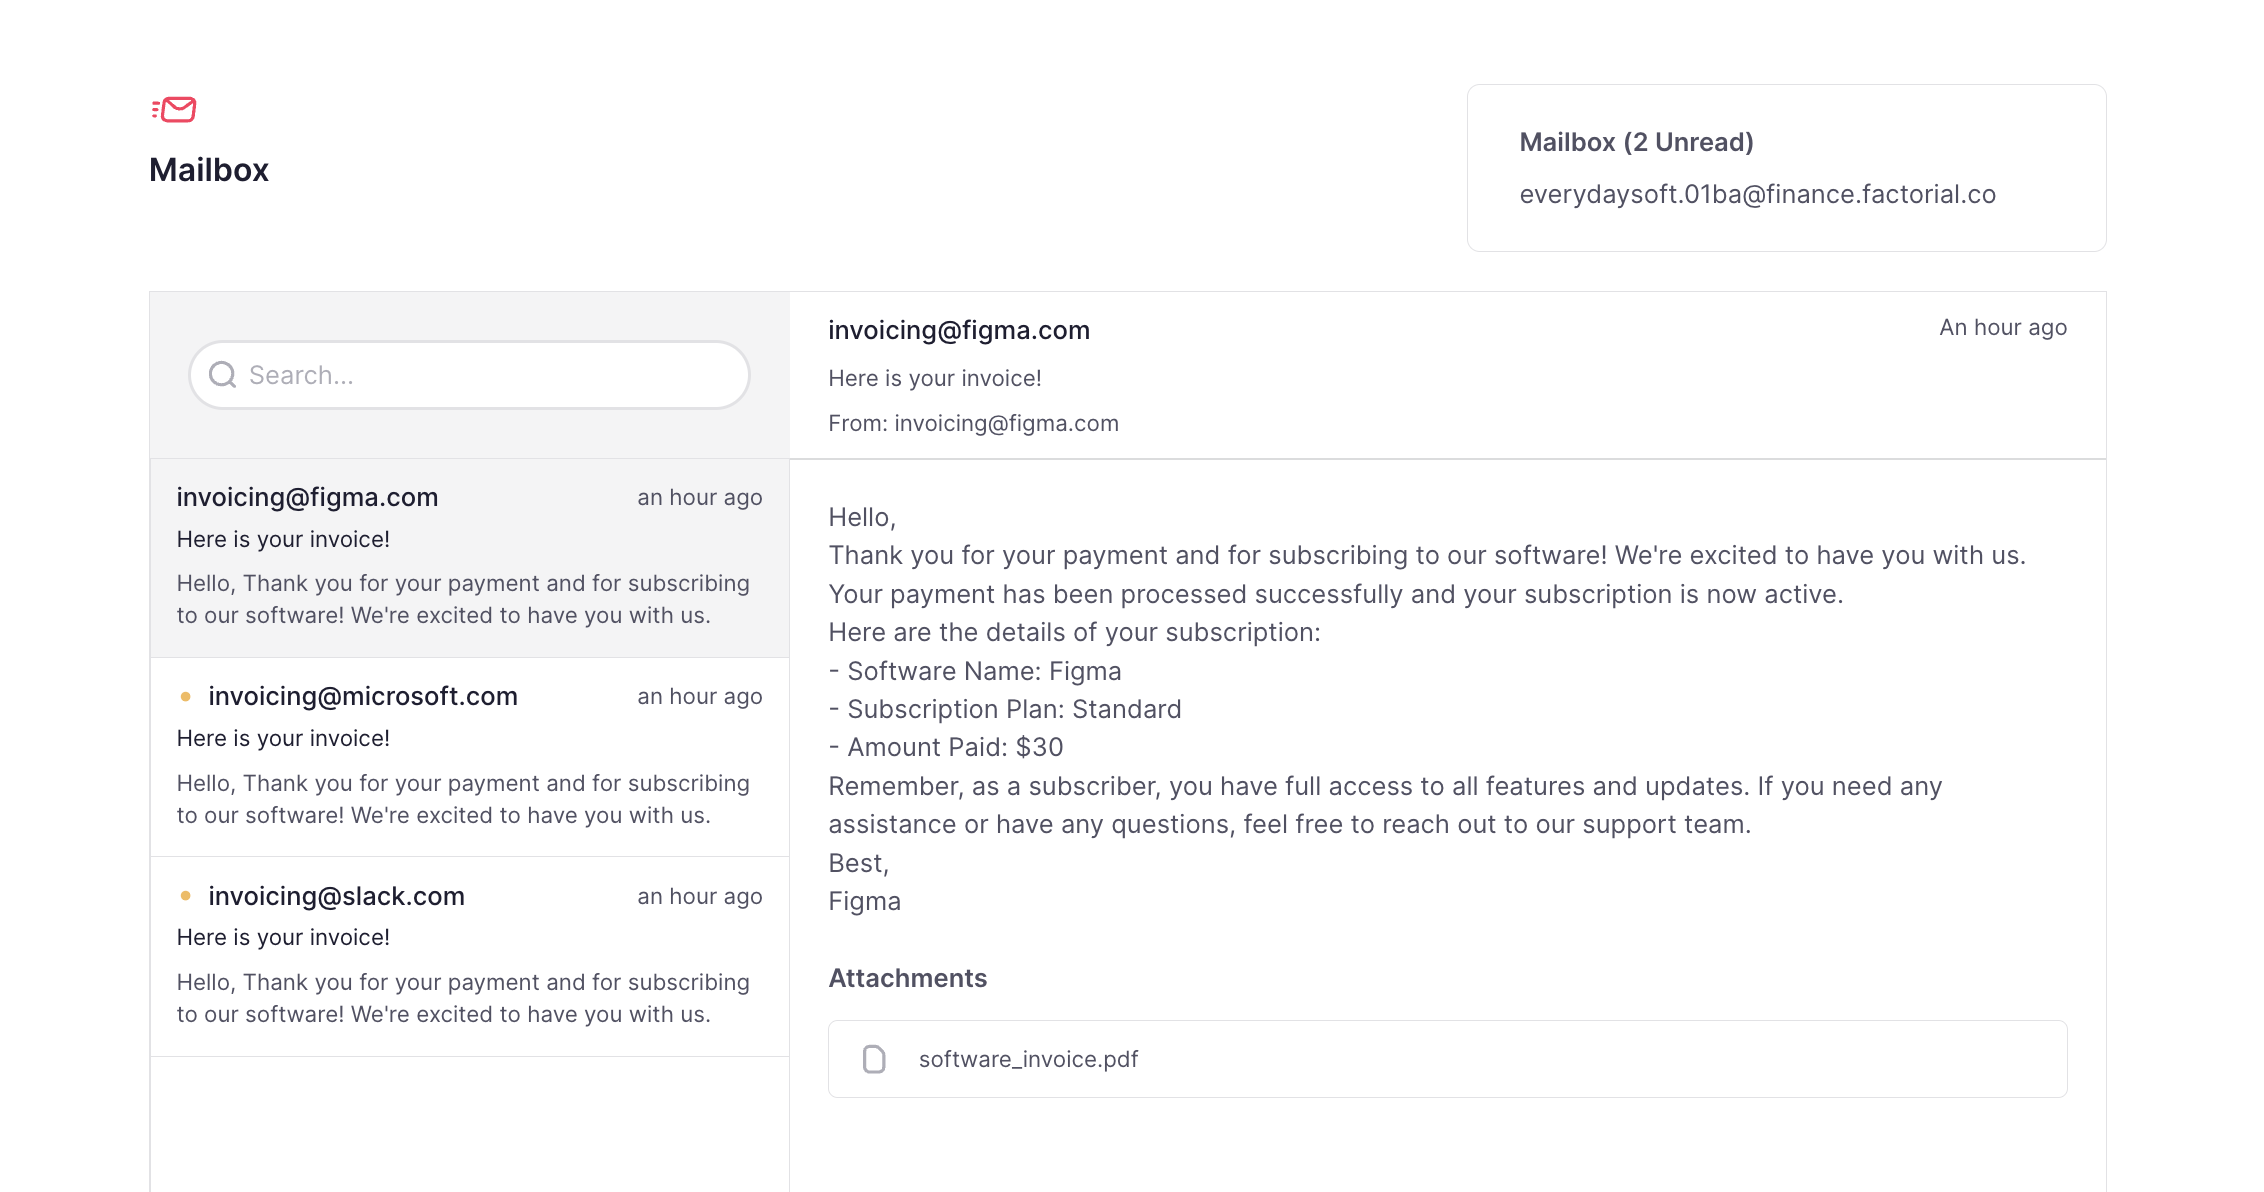
Receiving software invoices in the Mailbox
-
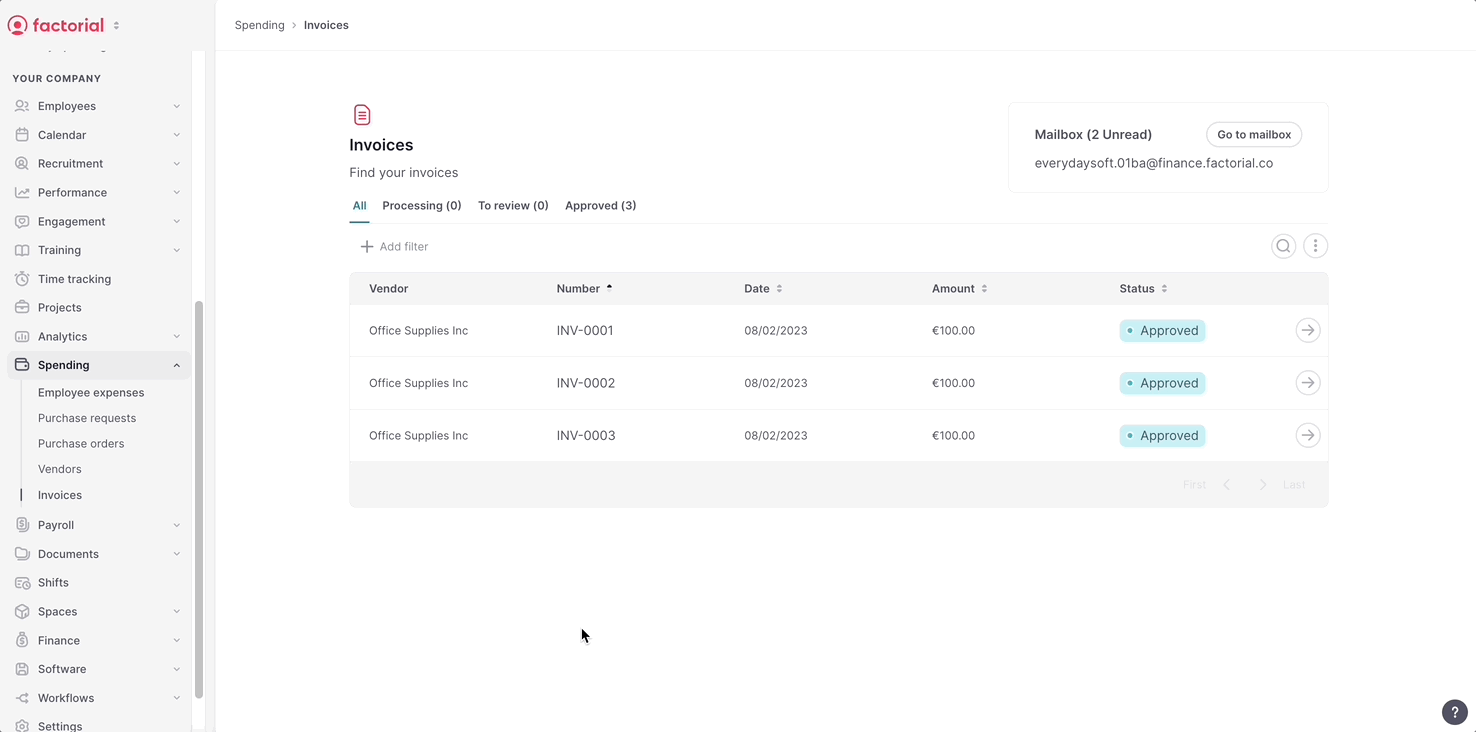
Access the Invoice section:
- Navigate to your sidebar and click on Spending > Invoices.
-
Retrieve the email address:
- Copy the email address displayed in the top right corner.

- Copy the email address displayed in the top right corner.
- Integration with software billing:
- Paste this email address into your software's billing section.
- Example: To receive Figma invoices, insert the provided email into Figma's billing settings.
- That’s it! From now on, the invoices will be received in the Factorial mailbox.
Using the Mailbox
You have at your disposal a mailbox where you can receive and view all the invoices from applications by email. It only works as an inbox, therefore, you will not be able to use this address to reply or send emails.
-
Access your mailbox:
- Go to Spending > Invoices and click on Go to mailbox in the top right corner.
-
Viewing invoices:
- Open received emails in the mailbox to access the attached software invoices.
Automating software costs: review and approval process
-
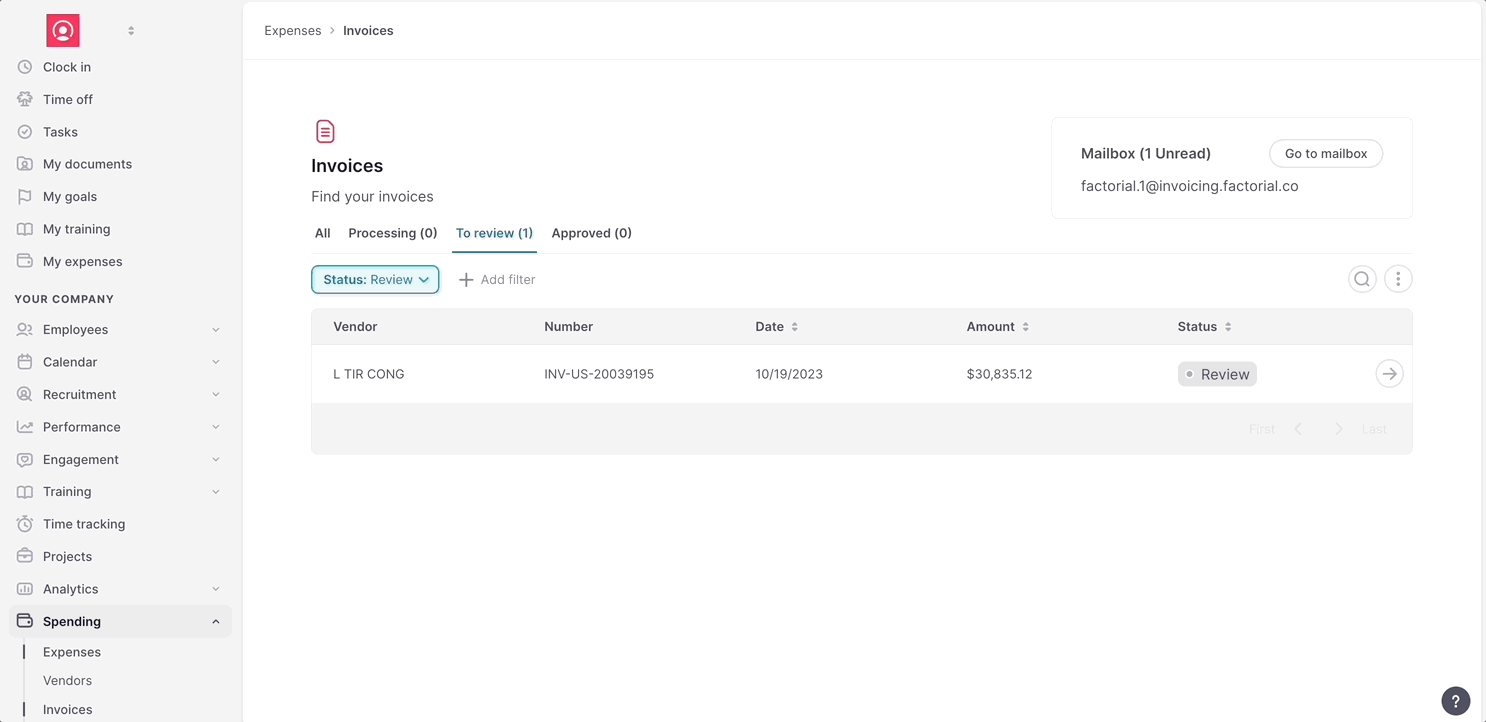
Navigating invoice management:
- Visit Spending > Invoices.
-
Reviewing invoices:
- Head to the To Review tab to see incoming invoices.
- Open an invoice to review pre-filled fields processed by OCR.
-
Approval process:
- Verify and complete any missing information.
- Associate the resource (software) is required.
- Click Approve to move the invoice to the Approved tab.
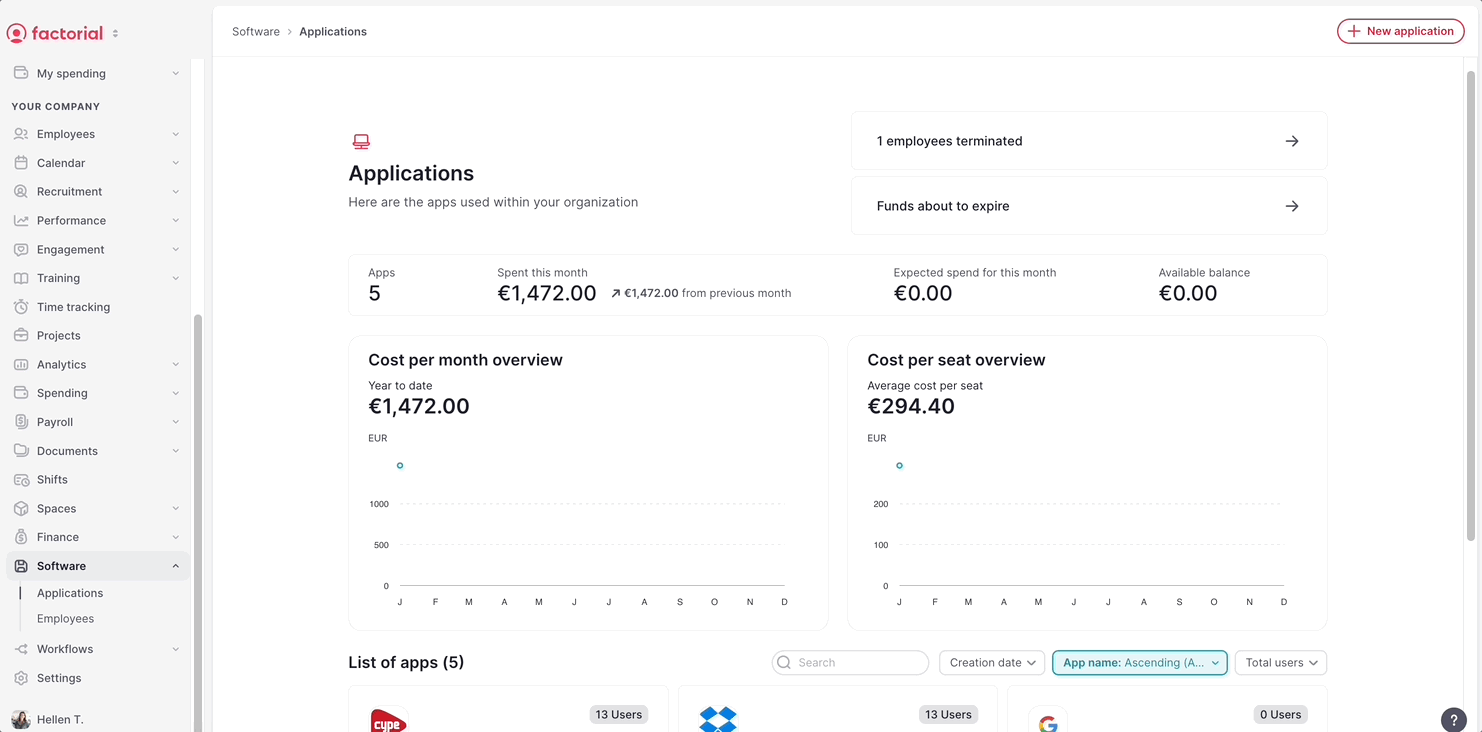
The cost amount of the invoice will be automatically displayed in the cost section within the software. Check it!
Whenever you receive an invoice, you must check the assigned vendor and add the corresponding associated resource. To simplify the process and avoid having to manually assign the associated resource for each invoice, you can set a default software for each vendor in the vendors section. Once this is done, the associated resource will automatically be assigned to the invoices based on the specified vendor.
Understanding invoice states
- Processing: the invoices are currently being processed with the OCR system, and no actions can be taken at this time.
- To review: in this state, the IT manager needs to open the invoice, check the prefilled fields, complete any remaining ones, and approve the invoice.
- Approved: here, you can find all the invoices that have been approved. The costs of these invoices will be automatically reflected on the software page.
Manual software cost upload from the software page
While the most automated form of updating the software cost management is using our Invoice tracking system, you can still upload manually the invoice through the software page.
-
Add via Software page:
- Go to the dedicated software page.
- Click New Cost
- Upload and Approve:
- Upload the software invoice and click Save.
- Review and complete any necessary fields.
- Click Approve to finalize.
- The cost amount of the invoice will be automatically displayed.
Manual uploads provide an alternative when required, though we recommend the automation with our Invoice Tracking System for seamless cost tracking.