Streamline your invoicing with Factorial's Invoice Tracking System. Easily upload invoices and use our OCR technology for automated data extraction, saving time and reducing errors. Simplify accounting entries and gain better financial control.
Where to find Invoices
- On your sidebar, go to Spending → Invoices
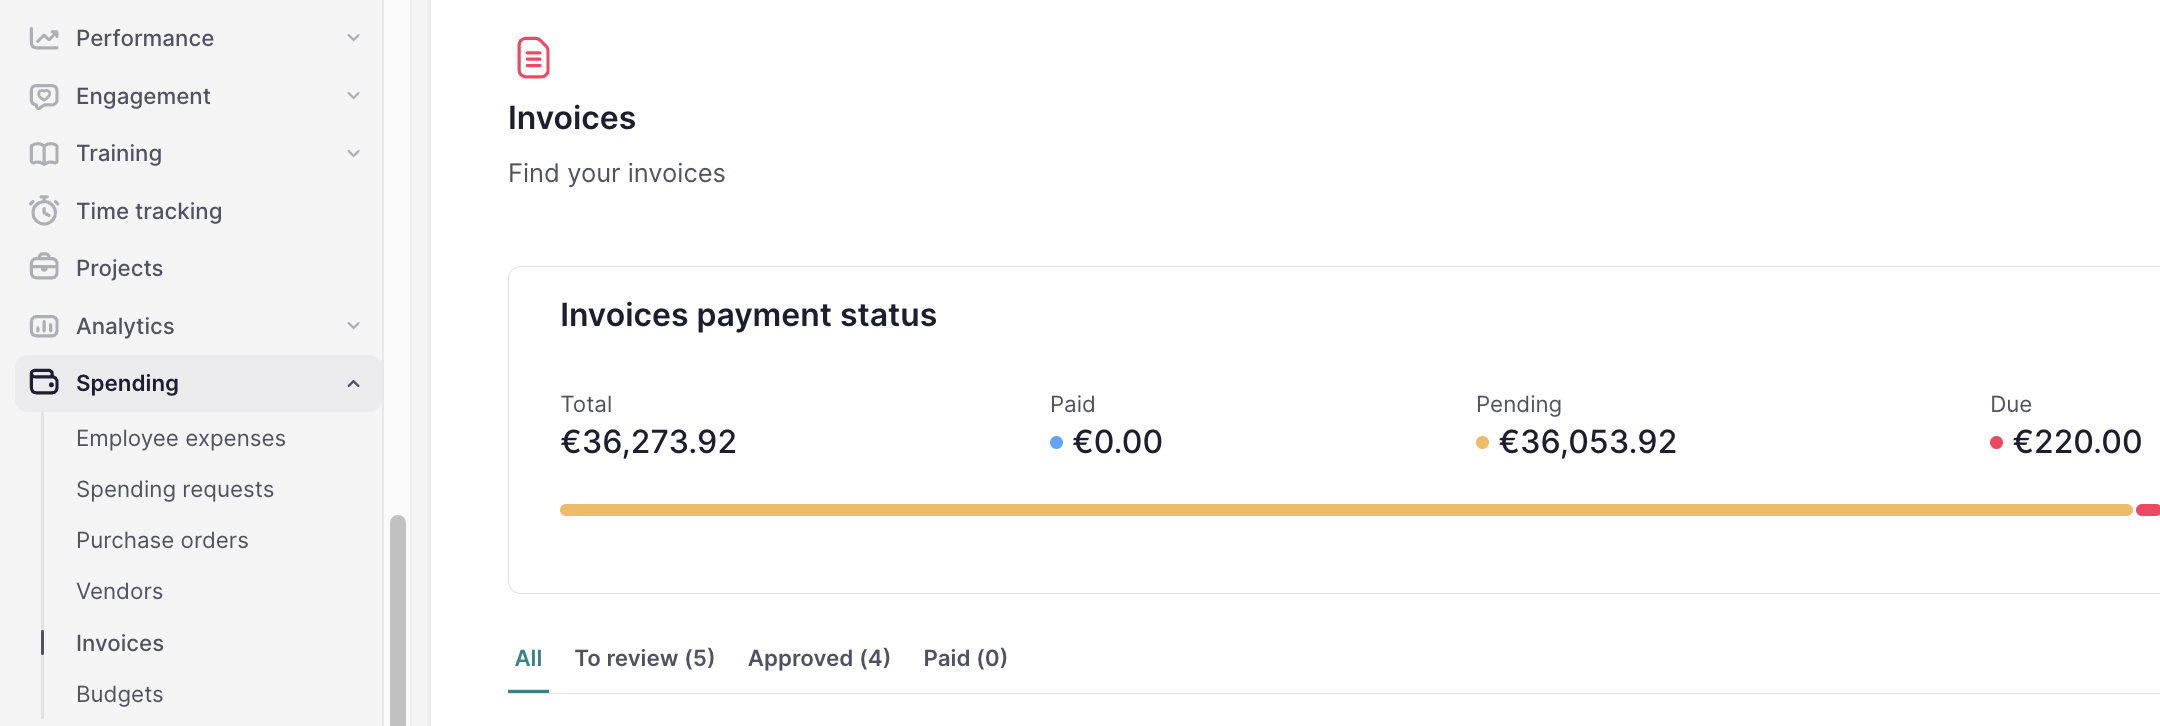
Invoices payment status
Track your invoice payment status here. Access detailed information to manage your finances effectively and ensure timely vendor payments. Key metrics provided include:
- Total: total amount of payments recorded.
- Paid: total amount that has been successfully paid.
- Pending: invoices that have not been paid yet but are within the payment timeframe.
- Due: invoices that remain unpaid past their due date.
- Number of pending and due invoices: a count of pending and overdue invoices.
- Base amount and taxes: a breakdown of the invoice amounts, distinguishing between the base amount and any associated taxes.

💡 These data are dynamic and will adjust based on the filters you set.
How to manage the status of the invoices
Your invoices can undergo four distinct statuses:
- To review: uploaded invoices enter this stage for accuracy checks. After verification, click Approve or Reject.
- Approved: invoices are ready to be paid.
- Rejected: invoices are marked as Rejected due to discrepancies or errors.
- Paid: invoices that have completed all the processes and have been paid. You can mark them paid there or though bank reconciliation.
To change the status:
- Open the invoice you want to update
- Select the action
- Invoices that are rejected cannot be moved to other statuses.
- Invoices under review can be moved to the statuses: Rejected, Approved, or Approved and paid.
How to upload invoices in bulk
- In the Invoices section, click Upload invoices at the top right corner
- Choose a file or drag it into the designated area
- Click on Finish and close
- Our OCR system will automatically read the data and autofill the information
- Review the prefilled data for accuracy
- If necessary, you can create a new vendor directly from this page
- Click on Approve

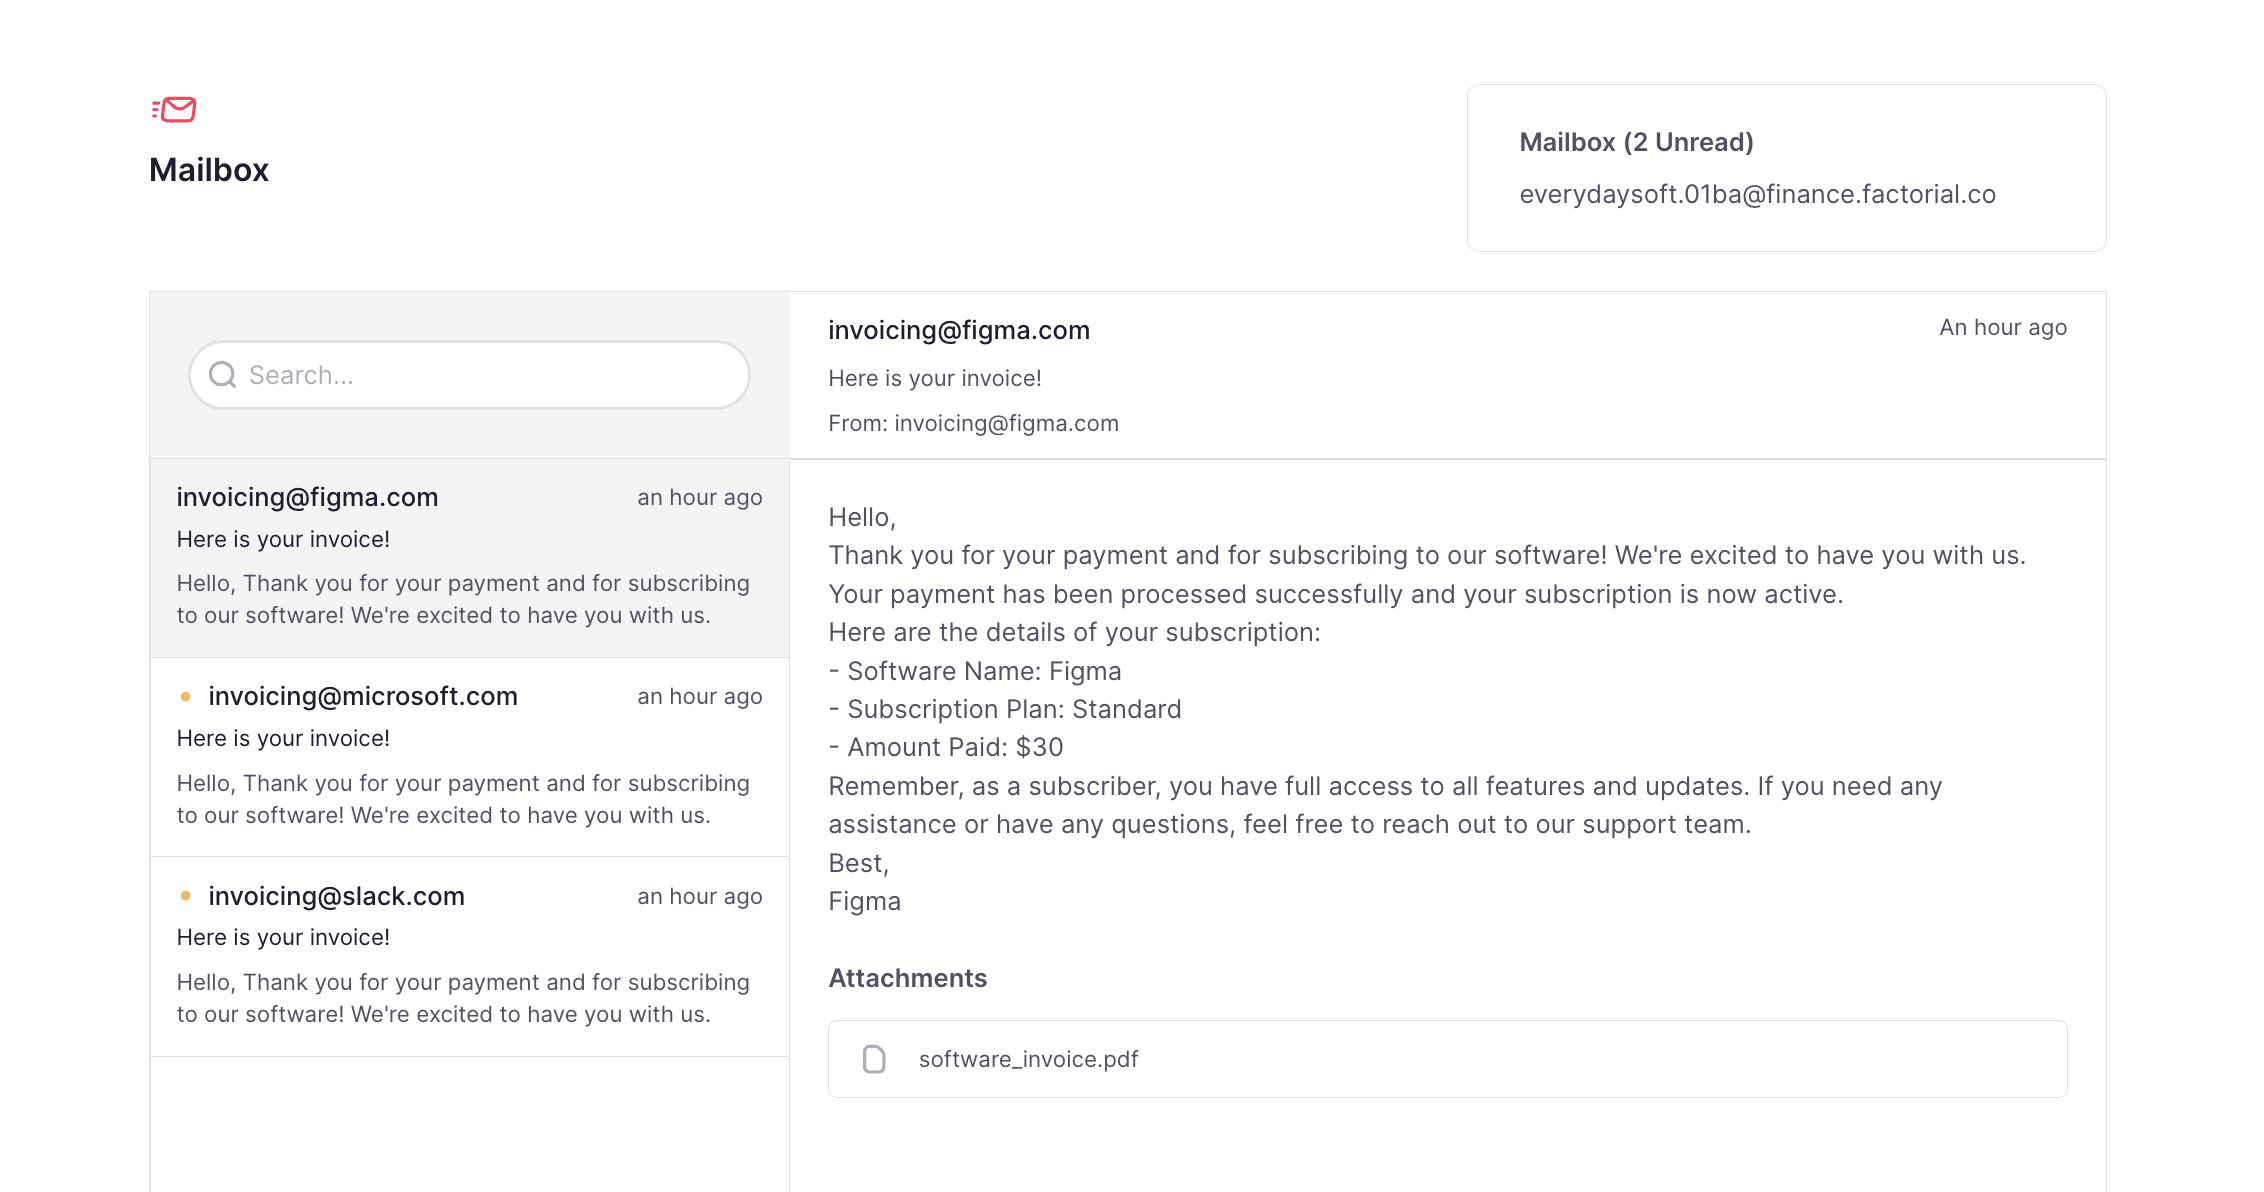
How to receive invoices in the Mailbox
You have a mailbox to receive and view invoices by email. It functions only as an inbox, so you cannot send or reply to emails from this address.
- Go to the Invoices section
- Copy the email address at the top right corner
- All your invoices will be received in the mailbox and automatically read by our OCR

How to export invoices
- Go to the Invoices section
- Click three dots icon at the top right corner
- Select Export invoices
- Choose the desired format, apply necessary filters, and configure column names to suit your requirements
- Click on Save
💡 You will receive an email with the exported file, and you can also find it in your documents section in Factorial.
How to manage bank accounts
Learn how to manage your bank accounts within Factorial, simplifying financial operations with seamless integration and automation.
How to add a bank account
- On your sidebar, go to Finance → Bank accounts
- Select the legal entity for which you want to create the account
-
Basic Information: fill out essential details to start data aggregation:
- Account alias
-
Account format options:
- IBAN
- Account number + Sort code
- Account number + Routing number
- Bank name + Account number
- CLABE
- Other
- Currency
- Your account will be automatically created upon completion!
Key functionalities in the Bank accounts section
View details
Access a side panel displaying account details, including legal entity, beneficiary name, IBAN, and currency.
- Click on View details
Import bank transactions
Upload a file to import your bank transactions into Factorial. Simply drag and drop the completed template, which we provide for you to fill out with data exported from your bank, into the system.
To import bank transactions:
- Click on Import bank transactions
- Download our template
- Retrieve the transaction data from your bank and fill the template accordingly
- Drag and drop the filled template into Factorial. If any errors occur, we'll guide you through correcting them until the upload is successful
- Click on Import data
Export transactions
Customize and export your transaction data in various formats, tailoring the exported information to your needs.
To export transactions:
- Navigate to the desired bank account section
- Click on the three dots icon and select Export transactions
- Choose your format, apply necessary filters, and configure column names to suit your requirements
- Click on Save
💡 Coming soon: Bank Account aggregation
View all your accounts in one place for a consolidated overview, eliminating the need to switch between multiple banking interfaces or applications.
Bank reconciliation
Overview of the Bank reconciliation view
The bank reconciliation interface is divided into three key sections: transactions, counterpart entries, and resulting entry.
- Left panel: displays bank transactions that are pending reconciliation. You can utilize the filter to toggle between pending and reconciled transactions
- Right panel: here, you can match transactions with the approved invoices and view counterpart entries. Only approved invoices are eligible for reconciliation
Reconciliation process
Follow these steps to reconcile a bank transaction:
- Select a bank transaction: click on the transaction you wish to reconcile
- AI suggestion: our AI tool will automatically suggest the corresponding invoice
- Reconcile: If the details are correct, click on the "Reconcile" button
- Confirmation: the transaction will be marked as reconciled and the invoice status will update to 'Paid'.
- Rejection option: if necessary, you can reject the AI’s suggestion and choose another invoice manually
Scenarios covered
- One Invoice - One bank transaction
- Partial payment: one Invoice → 1st bank transaction + 2nd bank transaction
- Several Invoices - One bank transaction
- One invoice - Several bank transactions
- Reconcile without a document
If you need to postpone reconciling a bank transaction, you can use the snooze function. Simply select the transaction, click on Snooze, and choose the duration for which you want to delay reconciliation.
Reconciling within the Invoice section
You can also initiate reconciliation directly from the invoice section:
- Access the invoice: navigate to an approved invoice and click on it
- Transactions associated: in the invoice details, you’ll find a “Transactions associated” section with a "Reconcile" button
- Reconcile: upon clicking, a new view will display all related bank transactions
- Complete reconciliation: select the appropriate transaction and confirm the reconciliation
This method supports the same reconciliation scenarios as mentioned before.
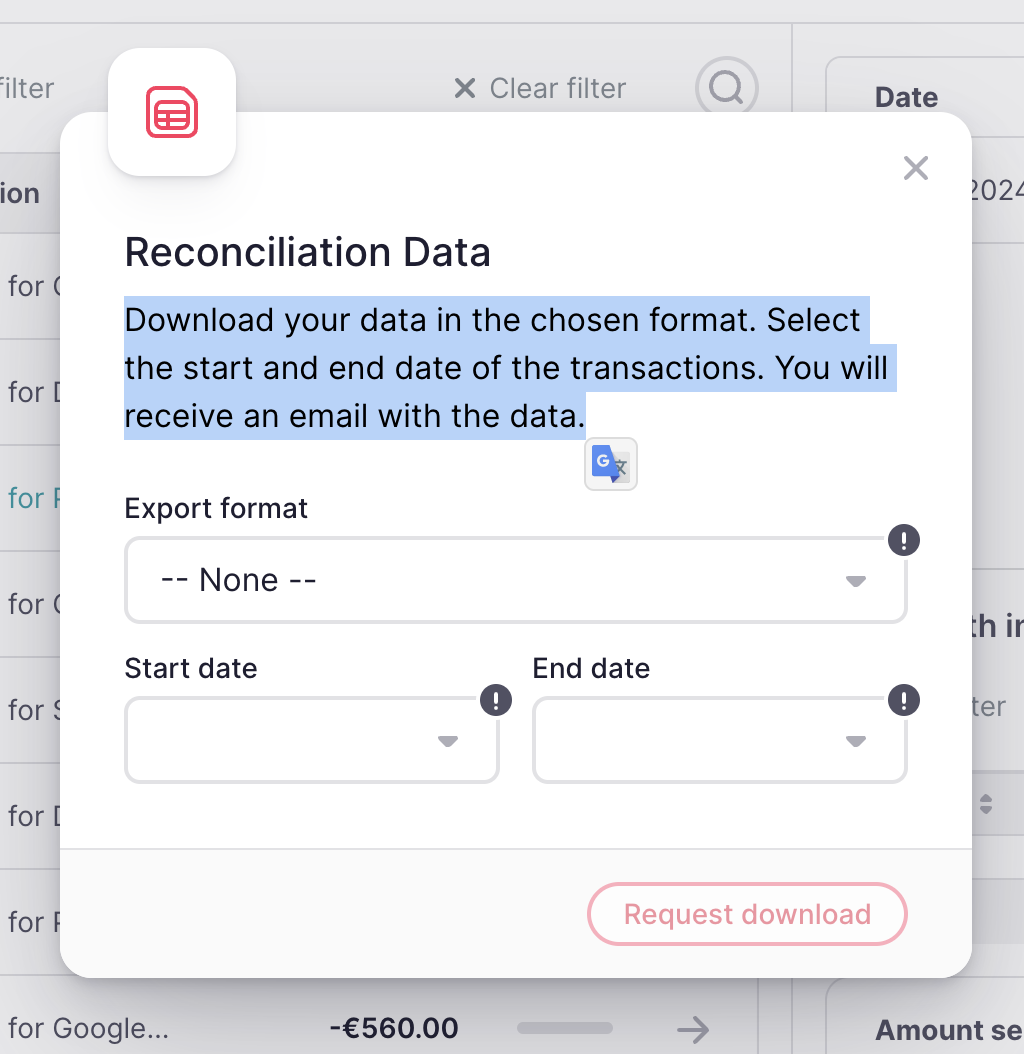
How to export your transaction data
-
Select export format and date range:
- Choose between a CSV or Excel file and the start and end dates for the transactions you want to download. This allows you to customize the period for which you need the data.
-
Receive your data:
- After selecting the dates, the system will process your request. You will receive an email notification with a link to download your data.
-
Download and review the Excel file:
- The file you receive will be in Excel format. It includes all transactions, invoices, links to the invoices, and reconciliation details.
- Download the file from the link provided in the email and save it to your device.