Configuration Section
After creating your survey a new tab will open where you’ll have to add:
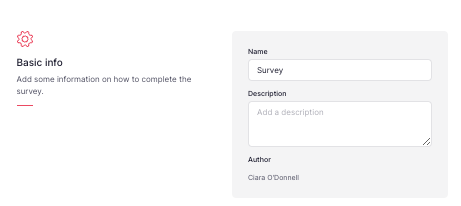
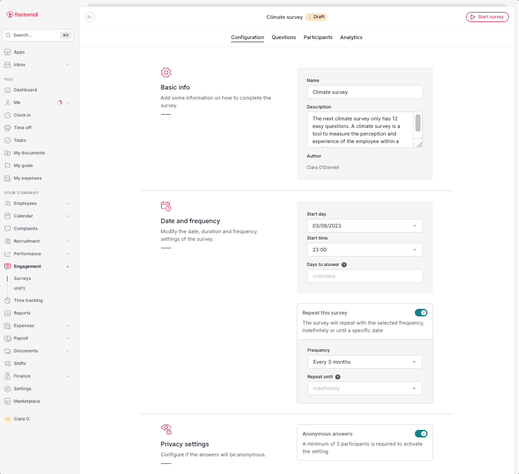
- Basic Info
Add the basic information about your survey.
- Edit the Name of the survey.
-
Add a Description
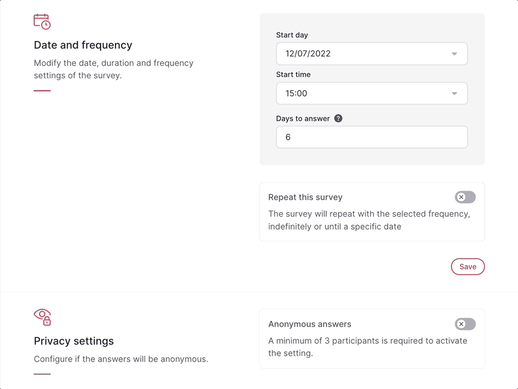
- Date and frequency
Modify the date, duration, and frequency settings of the survey.
- Select a start date
- Choose your start time
- Set the duration (days to answer)
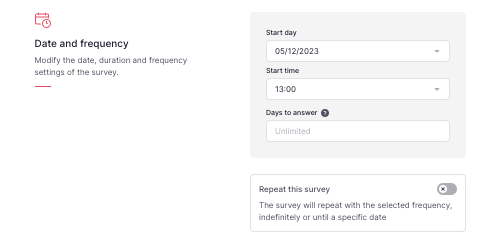
- If you want to repeat this survey:
- Activate the option Repeat this survey
- Choose the frequency
- Repeat until: you can choose the option No due date or set a specific date
- Click Save
🗓️ The cycle respects the starting date for the next repetitions.
⏳ The user can specify a time to answer for each cycle.
🚨 Keep in mind:
- Start date and time can be changed until the date arrives.
- Cycle settings can be changed after the launch. Some changes will require closing the current cycle and starting a new one.
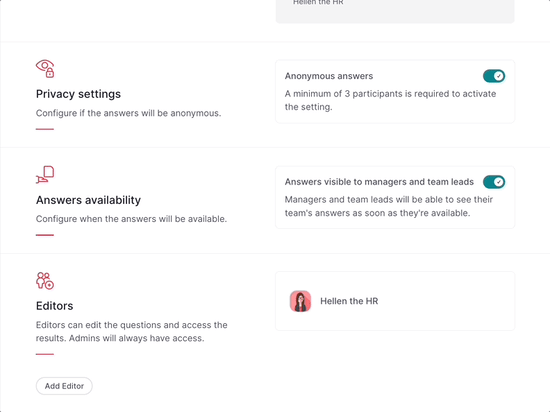
- Privacy Settings
Configure if the answers will be anonymous.

⛔ A minimum of 3 participants with their responses is required to see the results.
- Answer availability
Managers and team leads can see the responses and analytics ****of the employees they manage as soon as they're submitted.

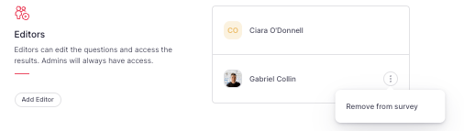
- Editors
👩🏾💼Different from managers, who will only be granted access to the results and statistics, editors can edit the questions and access the results. Admins will always have access.
💡 You may add as many editors as you wish and they can also be employees.
- Click on Add Editor
How can I Remove an Editor?
- Click on (...) in the Editors section
- Select Remove from survey
Once all the information is added:
- Click on Start survey
- Press Continue
📩 Automatic notifications
- You can notify reviewers with pending surveys to complete them by pressing on Send email reminder to pending participants
- You can directly share the survey link by pressing Share link

- Once launched, the employees will receive an email and a pending task notification on their Dashboard.
- Employees will receive an email 2 days prior to the close of the surveys